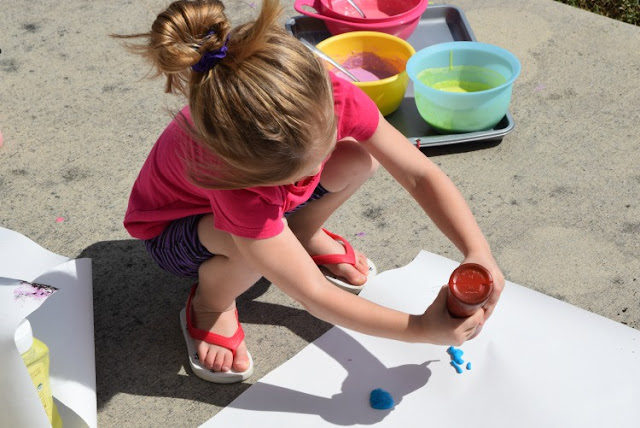
There's nothing like some good old fashioned process art to get kids excited! When I explained this Squirt! Drip! Pour! Process Art activity to my daughters, they could hardly believe it. We do lots of crafts, and we do a fair amount of process art, and I am more than happy for them to get messy. But they normally just don't WANT to get messy! But I assured them that they could wear old clothes, and that everything would wash off cleanly and quickly, and they were gung-ho. This process art project is perfect for a nice spring afternoon. Here's how to do it with your kids.
This
post may contain Amazon or other affiliate links. If you use these
links, I may earn a commission at no additional cost to you. Click here for my full privacy and disclosure policies.
Start by mixing up some homemade paint. Just mix a ratio of about 1/3 flour and 2/3 water, then adjust as necessary to get a good consistency. We used food coloring to make the different colors. You could also try liquid watercolors but I doubt the colors would be as vibrant.
*This paint has no preservative, and uses food ingredients! It doesn't keep well, so use it all up within about a day of mixing it. Also, leave any bottles open overnight so that that the paint can "breathe" and doesn't explode.*
[Related Read: Ultimate Guide To Summer Sidewalk Chalk]
For several weeks prior to this activity I started saving leftover food containers that had a squirt tip, like mustard, ketchup, and honey. I also had a set of condiment bottles that were 3/$1 at a dollar store. Fill your bottles with plenty of paint in a variety of colors. I also made up several bowls of paint that the girls could spoon into different drippy things.
I gathered an old coffee cone, an old colandar, and several bath toys with drippy holds. It will also be handy to have some extra water for thinning out paint that may be too thick, and a toothpick or skewer to help unclog the squirt bottle tips.
Head outside and spread out some large sheets of paper or old cardboard boxes.
[Related Read: Spray Chalk Splatter Painting]
*This paint will eventually come off of your patio or driveway, and the color should fade. But it may take a while. We've had a fairly heavy rain since we finished the activity, and it's still there. It probably would have helped to hose it off immediately. This may not be the best activity if you are expecting important guests soon!*
Then step back and let the fun begin! Lena started simple enough, drawing some basic figures and designs.
The girls enjoyed seeing how much paint came out the different bottles, and the different consistencies and colors of the paint.
Then they began experimenting with the drippy tools, and found that most of the paint was too thick to drip through nicely. We thinned some out and it worked better.
[Related Read: How To Not Freak Out During Messy Play]
Some of the containers refused to "drip" no matter how thin we made the paint, so Maggie turned to pouring instead!
Things were going well! The girls were making giant puddles of paint and getting loads of great fine motor development from squeezing all those bottles! They were mixing colors and exploring texture and splatter patterns.
[Related Read: Numbered Nature Tray]
And practicing a full yoga routine.
I can't even begin to tell you how much fun my girls had with this activity. They LOVED it! When we were finished, I just scooped them up and plopped them straight into the shower. Then I gathered up the paper and cardboard, rinsed the bottles and bowls, and were were all done!
You May Also Be Interested In
From Other Great Bloggers
Squirt Gun Painting from Fireflies and Mud Pies
Rainbow Marble Painting Process Art from Preschool Inspirations
Line Painting Process Art from Munchkins And Moms
Glitter Printing Process Art from Life Over C's


