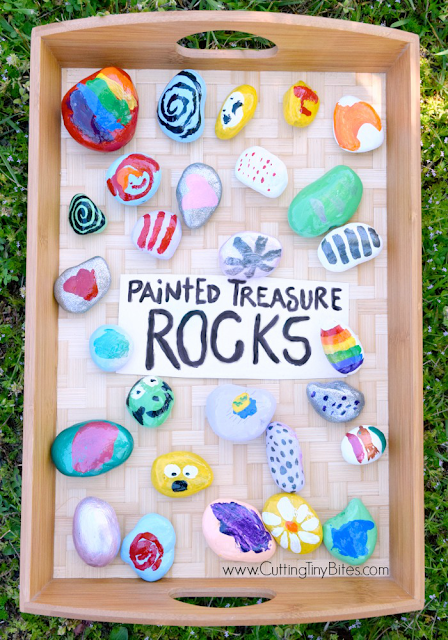
What is it about rocks? We can't go anywhere with out Lena and Maggie collecting any stone or pebble that they come across. The rocks go into their pockets, and then are displayed proudly across the back of the bathroom sink after a quick washing. Eventually they make their way to various treasure boxes or secret hiding spots in their rooms. Kids just love rocks, I guess. And kids love painting, too, so we decided to paint some treasure rocks.
There are lots of really cool tutorial for painting rocks for kids. Most of them will produce beautiful rocks that kids may enjoy playing with, but that adults have clearly made! I wanted to make some painted rocks that were actually painted by kids.
Making Painted Treasure Rocks is perfect activity to do with your kids on a spring or summer day!
Making Painted Treasure Rocks is perfect activity to do with your kids on a spring or summer day!
This
post may contain Amazon or other affiliate links. If you use these
links, I may earn a commission at no additional cost to you. Click here for my full privacy and disclosure policies.
You need some rocks. We decided to buy some at the craft store. Trust me, I initially balked at the idea of buying rocks, but I wanted them to be smooth and light colored. You could certainly go hunting for rocks in nature, though.
Wash and dry the rocks.
You also need an assortment of acrylic paint and brushes (both large and small). We had quite a few colors left over from different projects, and I bought a few new colors to round out our choices. It's fairly inexpensive, and a nice art supply to have on hand, so I didn't mind buying a few extra colors.
You will eventually need a waterproof sealer if you plan to keep some of your rocks outside, but we'll talk more about that in a bit.
Time for the good part! Paint the rocks. We started by giving each rock a nice base coat of color. Lena was actually sick on the day we did this, so it was a nice calm activity for her. I don't think she normally would have had quite so much patience.
I knew that (just-turned-4-year-old) Maggie wouldn't have the patience for this, so I painted the base coat on her rocks for her (with input as to the color choices).
We ended up doing 2 coats on the top, waiting for it to dry and then another 2 coats on the bottom. In between, you can put some plastic wrap over your palettes to keep the paint from drying out.
And Lena made sure to get every little nook and cranny, especially on this big red rock- her favorite.
We came back to this project the next day and added the designs on top. I only gave them one rule: no words. The rocks were just too small to handle a child's attempt at letters with a paintbrush, and I knew they'd be disappointed in how any "word" attempts came out. Instead, I suggested stripes, polka dots, hearts, swirls, spirals, and globs.
After the designs had dried, I added a nice shiny topcoat. It will help the rocks hold up to outside play (and lots of little hands), and the glossy finish makes the colors look extra bright and vibrant.
I used the Martha Stewart Crafts High Gloss Finish and couldn't have been more pleased with it. There are some super sensitive noses in our home, and using an aerosol sealer was out of the question. This glossy finish had just the slightest bit of odor when opened up inside, but I didn't detect it at all when I sealed the rocks outside OR once they had dried and were brought back in.
I will caution you to paint the rocks carefully, without too much excess sealer. I did a few rocks with too much sealer, and it dripped down, stuck to the paper plate below, and ended up pulling some of the colorful paint off the rocks when I unstuck them. Just make sure not to have any drips touching the plate below.
Your kids will love their Painted Treasure Rocks for years to come. These rocks would also make sweet gifts for parents, teachers, or grandparents!
You May Also Be Interested In
From Other Great Bloggers
Space Rocks For Your Sensory Bin from Life Over C's
Ladybug Garden Rocks from Powerful Mothering
Counting and Sorting DIY Love Bug Rocks from Where Imagination Grows


