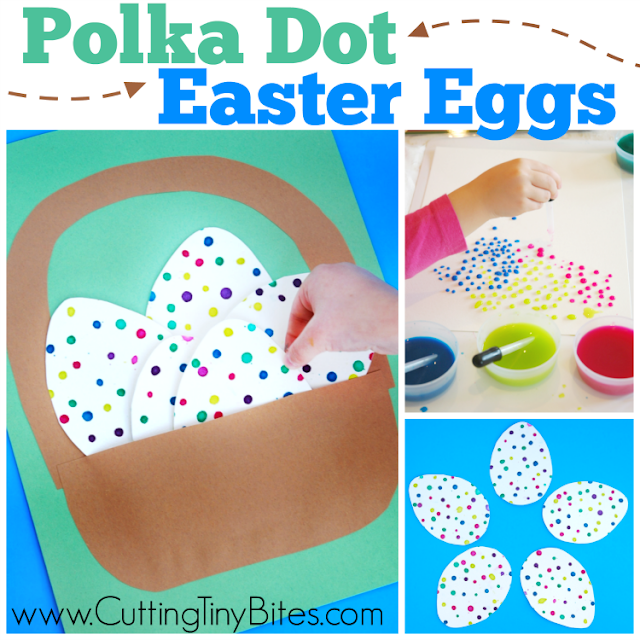
My kids love using eyedroppers, so when it came time to think of some Easter crafts, I knew immediately that we should make some eyedropper eggs. They turned out great, but then I wondered what we would do with loads of paper eggs floating around the house. They'd end up everywhere! So we whipped up cute little paper baskets to stow them in. Here's how to make your own Polka Dot Easter Eggs in a basket.
[Click HERE For More Great Spring Crafts And Activities]
This
post may contain Amazon or other affiliate links. If you use these
links, I may earn a commission at no additional cost to you. Click here for my full privacy and disclosure policies.
Gather Materials for Polka Dot Easter Eggs
*If you don't have liquid watercolors, you can make your own by breaking half a cake of dry watercolors (like these) and dissolving it in about 1/3 cup of warm water.
Add Polka Dots To Your Eggs
Start by making your eggs. Using a full sheet of watercolor paper, show your child how to use the eyedropper, slowly squeezing one drop at a time. I remind my girls that we don't want big puddles, only tiny drops.
Using the eyedropper is great fine motor work for little hands.
You can see the difference that high quality watercolor paper makes. In the picture above, we were using up an older, off brand (from Target) pad of watercolor paper. The paint quickly soaked in, the colors bled together and didn't stay vibrant.
Then we switched to a new pad of higher quality watercolor paper (from a craft store) and the drops stayed on the surface, slowly sunk in to the paper, and the colors stayed nice and bright. Both versions look nice, but if you're going for polka dots make sure to use nice paper.
Once you've covered your paper as much as you'd like, set them aside to dry. After they've dried, turn the paper over and draw egg shapes.
You can free hand them if you're brave, but I printed this egg template from Activity Village, cut one out, and traced it.
Make An Easter Basket For The Eggs
Draw a simple basket shape and handle on brown construction paper. Making them separate like this makes it easier for kids to cut out.
Glue the handle on to a separate sheet of paper. For the lower part of the basket, glue only along the sides and the bottom. I drew a line for my girls to glue along-- no glue on the top or in the center. This allows the basket to hold the eggs in a little pocket.
Once everything is dry, load up your basket with eggs!
For more great Easter ideas for your preschooler, visit the Cutting Tiny Bites Pinterest board below.
You May Also Be Interested In
Basket Weave Easter Eggs
Easter Egg Lacing Cards from The Kindergarten Connection
Color Matching Bunny Tails from School Time Snipppets
Jeweled Easter Egg Craft from Rhythms Of Play
From Other Great Bloggers
Easter Egg & Toothpick Sculptures from Stir The WonderEaster Egg Lacing Cards from The Kindergarten Connection
Color Matching Bunny Tails from School Time Snipppets
Jeweled Easter Egg Craft from Rhythms Of Play


