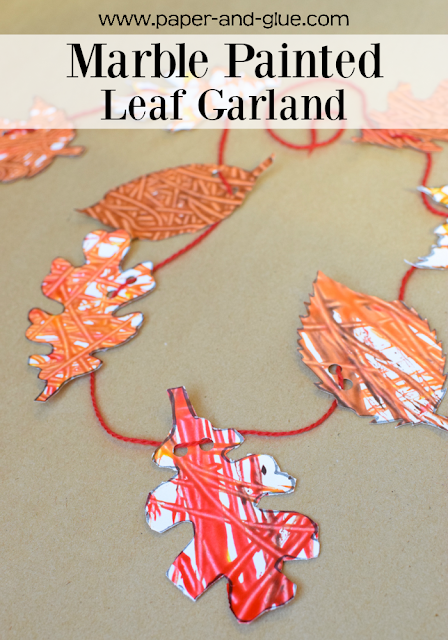
Still looking for some fun autumn crafts for your kids to enjoy? This Marble Painted Leaf Garland is sure to please. It starts with one of our favorite process art strategies and ends with a beautiful fall decoration that will spruce up your living room or a child's bedroom for the season! Here's how to make your own.
[Click HERE For More Great Fall Crafts And Activities]
If your kids end up enjoying marble painting, be sure to check out how we painted pumpkins, apples, turkeys, and Christmas trees, too!
This
post may contain Amazon or other affiliate links. If you use these
links, I may earn a commission at no additional cost to you. Click here for my full privacy and disclosure policies.
Gather Materials
For this project, you'll need:
- marbles
- children's paint in fall colors
- a large box or box lid
- printable leaf template
- cardstock
- tape
- scissors
- hole punch
- yarn
Paint Your Leaves
Begin by painting your leaves. Print several copies of a leaf template on sturdy cardstock. I liked this one because it had a variety of leaf shapes on one page.
Tape the paper inside of your box or box lid. We used half of a scrapbook paper storage box, but in the past we've also had success with a standard plastic storage box and even a cardboard Bankers Box. Anything will do!
Squirt several small puddles of paint around the edge of the paper and drop in a few marbles.
Let your children shake, rattle, and roll the marbles around. As they do, the marbles will pick up paint and slowly cover the page. Keep rolling until you've got the kind of coverage you like. My oldest daughter likes to cover the ENTIRE page when we marble paint, so her papers always end up with the colors all mixed together with marble tracks running over them.
Once you've painted several pages, set them aside to dry.
Make A Leaf Garland
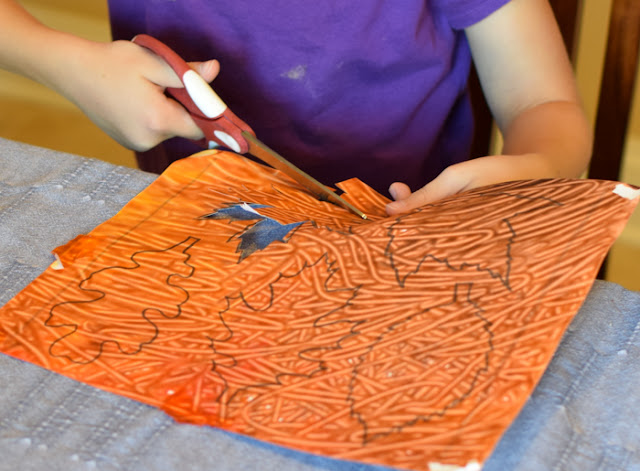
Once your leaves have dried, it's time to cut them out. Some of these leaves can be tricky with all their little nooks and crannies. Lena was able to cut hers out on her own, but Maggie eventually wanted some help on hers. Make yourself a nice pile of leaves!
Finally, grab a hole punch and punch two holes in each leaf, about 1 inch apart. We oriented our leaves in different directions, but you could also make them all with the stem up or the stem down.
Thread a length of yarn through the leaves and you've got yourself a beautiful garland!
You May Also Be Interested In
From Other Great Bloggers
Simple Leaf Window Garland from Hands On As We Grow
Easy Leaf Garland Craft For Kids from Crystal And Company
Felt Leaf Garland from Kitchen Counter Chronicles
Newspaper Leaf Garland from Red Ted Art
Easy Leaf Garland Craft For Kids from Crystal And Company
Felt Leaf Garland from Kitchen Counter Chronicles
Newspaper Leaf Garland from Red Ted Art


