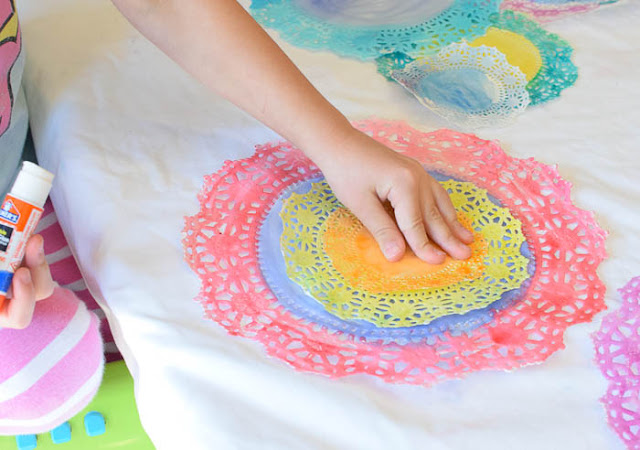
My girls LOVED how beautiful our Valentine's Day Suncatchers turned out recently, so we decided to use the same technique to make Spring Flower Suncatchers. The frills and ruffles of a paper doily make pretty petals, and the thin paper is perfect for soaking up watercolor. Luckily, we've done plenty of doily crafts before (Christmas Trees, Pumpkins, and Valentine's Day T-shirts) so we had a good stash of sizes to use!
[Click HERE For More Great Spring Crafts And Activities]
This
post may contain Amazon or other affiliate links. If you use these
links, I may earn a commission at no additional cost to you. Click here for my full privacy and disclosure policies.
Gather Materials
To make Spring Flower Suncatchers, all you need are paper doilies in a variety of sizes (make sure you have some little ones for flower centers), watercolor paint, paintbrushes, and a glue stick.
If you'd like to make some traditional flowers, be sure to paint lots of plain yellow and orange small centers.
Set the doilies aside to dry. The paper is very thin, so it doesn't take long. You can easily paint the doilies in the morning and assemble the flowers and finish the project in the afternoon.
Assemble Flowers
Once the doilies have dried, assemble them into flowers. Use a glue stick to layer them up however you'd like!
Just put a dab of glue in the center and then place another doily on top. You can make your flowers 2, 3, or even 4 layers! Just remember that the more layers you have, the less transparent and suncatchery they become.
Don't they look pretty?! Time to hang them up. We just used tape and arranged them in our favorite kitchen window.
This would be a great project for a preschool or kindergarten classroom to work on together. Make a whole garden!
You May Also Be Interested In
From Other Great Bloggers
Flower Suncatchers from Housing A Forest
Flower Petal Suncatchers from Messy Little Monster
Petal Suncatcher Craft from Craftulate
Nature Suncatcher Wind Chimes from Hands On As We Grow


