My older daughter has done several origami projects with me before, and she's always asking for more. While this Folded Paper Christmas Tree Ornament isn't technically origami (since it starts with round paper) it's pretty darn close, and it's such a cute way to make a Christmas tree! I love origami because it develops fine motor skills, basic geometric understanding, and creative thinking. Make a few Christmas trees for your holiday decorating this year!
[Click HERE For More Great Christmas Crafts And Activities]
I first saw this craft nearly 10 years ago, in a magazine. I used to make these with my students when I taught, but now I can't remember which magazine the idea was from. I'd LOVE to be able to provide credit to the original idea if anyone happens to have seen the original!
This
post may contain Amazon or other affiliate links. If you use these
links, I may earn a commission at no additional cost to you. Click here for my full privacy and disclosure policies.
The inspiration for this craft came from one of our favorite Christmas books, The Littlest Christmas Tree by R.A. Herman. It's a sweet and simple story about the fate of the littlest Christmas tree on the lot, who fears that no one will take him home. We decided to make our own little Christmas trees!
After one or two "layers" of this project, she had memorized the folding pattern and could manage it almost all by herself. I would recommend doing this project with elementary aged children or older.
Ready to make your own? Let's get to it!
We used scrapbook paper in a variety of green Christmasy patterns. Traditional origami paper would work fine, if you could get the sizes to work properly.
Begin by tracing and cutting out circles in four different sizes- we used a variety of bowls and saucers. Our largest circle was about 7 " across and our smallest was about 5" across.
You'll repeat the same folding pattern with all of your circles.
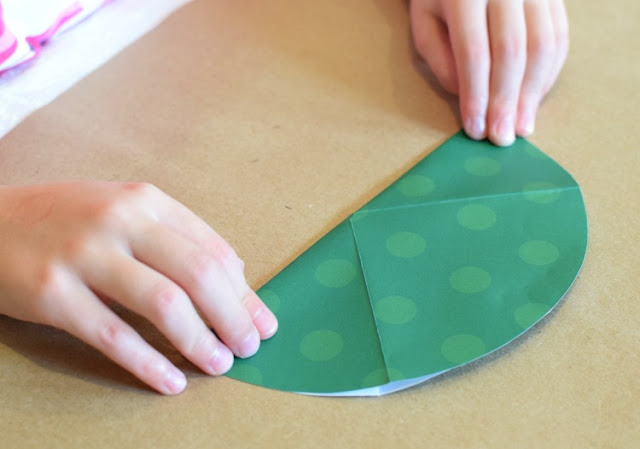
Unfold the circle, and then continue folding the circle in half, matching up crease lines as necessary until you've divided the circle into 8 equal wedges.
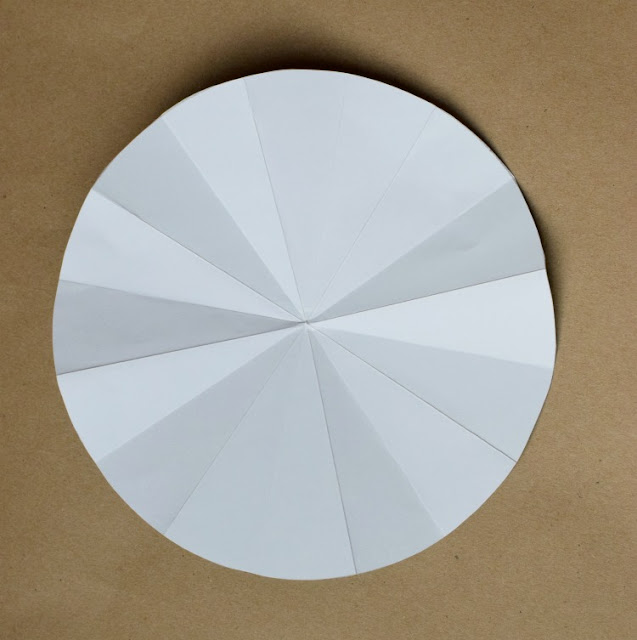
Next, flip the paper over so that the patterned side is up. Continue folding the circle in half, dividing each of your 1/8 wedges in half again, so that you end up with 16 wedges. It helps to match up the crease lines as you fold (pictured above) to keep the wedges equal.
The reason for flipping your paper over to complete these folds is that so your crease lines are going in alternate directions. When you've finished folding, you should have divided your circle into 16 equal parts, with alternating "mountain" and "valley" folds.
Time for the fun part! Orient your tree layer so that the center is pointing outward and begin to accordion fold all those crease you made, as you make your way around the circle.
Make your four tree layers. I made ours so that when assembled they would be alternating darker and lighter patterns, so that there would be more contrast.
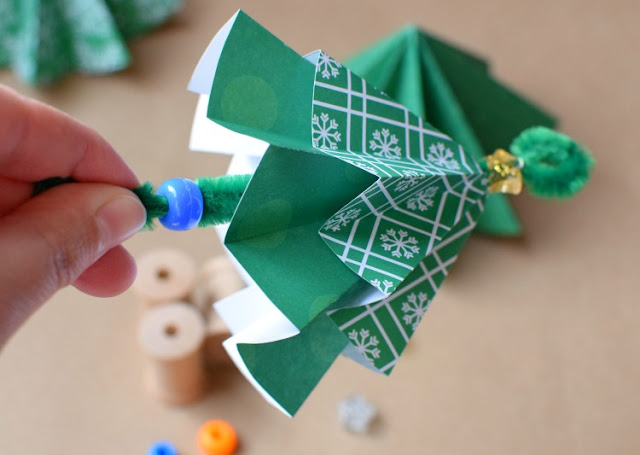
To turn your tree into an ornament, you need a green pipe cleaner, several pony beads, and a star bead for the top. You could also just use a plain yellow or gold bead, but I think the star is a nice touch. The trunk of the tree is a plain wooden spool.
Fold the pipe cleaner in half, and thread your star bead on both strands, leaving a small loop at the top.
Next, hold the two ends of the pipe cleaner closely together and poke them through the center of your smallest tree layer. It will come unfolded a bit, but should rearrange easily.
Add a pony bead as a spacer underneath the first tree layer. Then, add the second tree layer. Continue adding the tree layers, adding a pony bead between each one. This keeps the layers from collapsing on themselves and turning into a flat, squatty tree.
Once you've added all the tree layers, put the wooden spool on the bottom of the pipe cleaners. Ours were snug enough that they stayed in place without any glue, but you could certainly add a drop or two of glue in the spool if necessary.
This post is part of a 10 Days of Kid-Made Christmas series hosted by Mama Miss.
Be sure to head over to check out all of the other ornaments inspired by children's books, including today's other ornaments:
North Pole Ninjas from Mama Smiles
Dream Snow Ornament from Sunny Day Family
Clothespin Doll Ornament from Freshly Planted
String Art Ornament from Mama Miss


