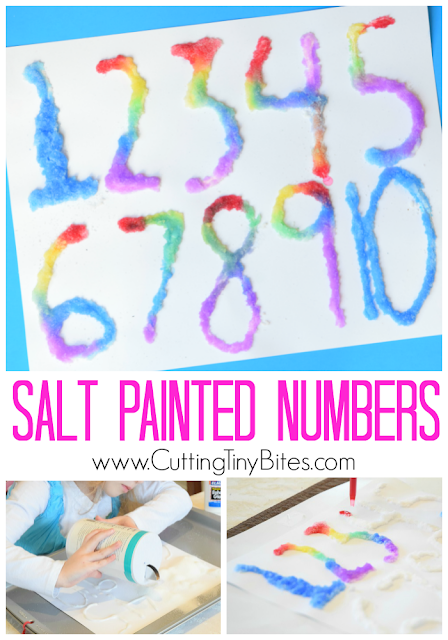
My girls have grown up doing a TON of crafts. I love crafts and they love crafts (usually!) so they're a regular part of our routine. I recently realized, though, that we had never done this classic staple of childhood craftiness-- salt painting! Since I'm working on Maggie with her numbers, we added a nice little math twist by making Salt Painted Numbers. Guess what? Salt painting lives up to the hype! The girls loved it and the results were beautiful!
Here's how to do it.
This
post may contain Amazon or other affiliate links. If you use these
links, I may earn a commission at no additional cost to you. Click here for my full privacy and disclosure policies.
Materials For Salt Painting
- cardstock or construction paper (We tried both. Cardstock works better, but construction paper will do in a pinch.)
- pencil
- school glue
- table salt
- liquid watercolors
- eyedroppers
- small cups for mixing paint
Squeeze Your Glue
Since we were working with numbers, I drew the numbers 0-10 in pencil on a sheet of cardstock. The girls squeezed a line of glue over numerals. Squeezing glue is SO good for building the muscles in your children's hands. We used this as a learning activity, but you could certainly allow your kids to do free art with this technique, too!
Maggie said each number as she slowly added the glue. She ended up with a thin line over her numbers, since her hands are smaller and it was harder for her to squeeze the glue.
Lena was able to make a nice thick line that ended up soaking up the watercolors beautifully!
Sprinkle The Salt
Using regular table salt, sprinkle the paper, covering all the glue. Be sure to do this on a pan so that you won't have a salty mess!
You may want to consider gluing and salting in batches, so that the glue doesn't dry before it has been salted. It will depend on how fast you're working!
Shake off the excess salt and set the paper aside to dry. Let it dry for a long time, so that the salt will be extra thirsty for the watercolor. Ours waited several days before we got around to finishing them.
Time To Paint!
Mix up some liquid watercolors. You want them to be dark and vibrant, so that your colors will be bright! We used around 7-10 drops of liquid watercolor and 1/4 cup of water. Add an eyedropper to each color.
Let your child start painting. Show them how to squeeze the bulb of the eyedropper, submerge the tip in the liquid watercolor, and release the squeeze to draw up the paint. Then, encourage them to very gently squeeze the bulb to let out one drop at a time onto the salt.
Lena very quickly decided to make her numbers rainbow colored. It was so fascinating to watch the colors meet and blend slightly!
Maggie stuck with mostly solid colors. Once again, she repeated the numbers as she added the colors.
Here's a look at how the construction paper worked. As you can see, all the water from the glue and the liquid watercolor ended up warping the paper quite a bit, and fading the color of the paper around the numbers.
*Psst. Like Maggie's "3" shirt? Find out how to make your own "How Old Are You?" Applique T-Shirt!*
Here's a final peek at Maggie's Salt Painted Numbers. She was almost 4 when we completed this activity.
And here's a look at Lena's work, at age 5 1/2.
You May Also Be Interested In
20 Ways To Play And Learn With Coins
Sparkly Mixed Media Winter Paintings from Stay At Home Educator
Teaching Numbers With Play Dough from Life Over C's
40 Awesome Number Activities for Preschoolers from Hands On As We Grow
From Other Great Bloggers
Salt Painting from Powerful MotheringSparkly Mixed Media Winter Paintings from Stay At Home Educator
Teaching Numbers With Play Dough from Life Over C's
40 Awesome Number Activities for Preschoolers from Hands On As We Grow


