My daughters LOVE playing mermaid. They play "mermaid lagoon" (from Peter Pan), Ariel, "orphan mermaids get rescued by the Coast Guard" and all sorts of strange versions of Aquaman and Queen Mera. I thought it was high time for some mermaid tails to extend their play!
This isn't a super fancy tail, nor would my technique win any special costume or sewing awards! The inside doesn't look great, and some of the seams aren't finished "properly." But it looks great on the rightside, and it will never leave my house, so it works beautifully as a pretend play prop! I do know how to sew with polished seams and all that, but it just takes so much longer. I'm a bit of a "sloppy sewer" whose main goal is to make projects that make me or my children happy!
Here's how to make your very own mermaid tail.
This
post may contain Amazon or other affiliate links. If you use these
links, I may earn a commission at no additional cost to you. Click here for my full privacy and disclosure policies.
Materials for Mermaid Tails
- swim or dancewear fabric - measure from your child's waist to their ankles; that's the length of fabric you need (I used a fabric called "Mystique" which is a super shiney Spandex normally used in gymnastics leotards.)
- wide elastic for the waist- approximately 1.5" wide (enough to go around the waist)
- small amount of white slinky fabric (for fish scales and ruffle trim)
- sequin trim -approximately 3/4" wide (enough to go around the waist and foot opening at the bottom)
- usual sewing supplies (thread, scissors, pins)
Cut Your Fabric and Make the Tail Itself
Take a pair of leggings that fit your child well. Lay them on top of your fabric and place the legs together.
Cut around the leggings, about 1" from the edge on the sides. You don't need extra on the top or bottom. Cut 2 pieces exactly like this (front and back). This material is SO slinky and slippery that I found it easier to just cut them separately, rather than try to fold the fabric and cut the 2 pieces at the same time.
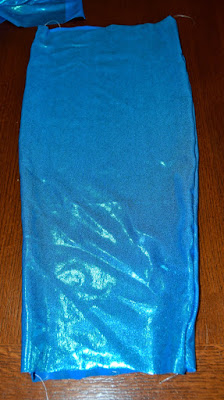
Place right sides together, and sew along the sides using a zig-zag stitch. Use a generous seam allowance. Since this tail is meant to be tight, that also means there will be quite a bit of stretching at the seams.
Turn right side out. You'll have a tapered tube.
Add A Waistband and Embellishments
Next, you'll make a waistband. Cut a length of wide elastic that is exactly the same length as the circumference of the waist.
Next you'll attach the waistband to the top of the tail. Turn the tail inside out and place the waistband underneath the fabric of the tail. Pin the waistband in place. There isn't much difference between the circumference of the tail and the circumference of the waistband, but it is enough that pinning will help to keep the gathering even. Sew in place using a zig-zag stitch.
When you turn the tail back right side out, you'll notice that it's not super pretty this way. It's okay. All that stitching is going to be covered up by your scales and sequin trim.
The next step is to add all of the embelishments to the waistband. Cut 15-20 semicircles from a white slinky fabric. I varied the size of mine, but they should be around 2-4" in width.
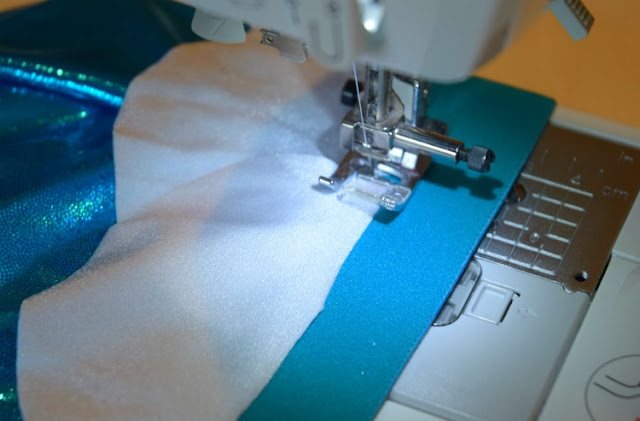
Again, using a zig-zag stitch, add the scales to the waistband. First sew one, then when you're about half-way through adding it, place another one on top. Keep going around the entire waistband, overlapping the scales. I actually ended up going around twice in ordered to give it a more layered look.
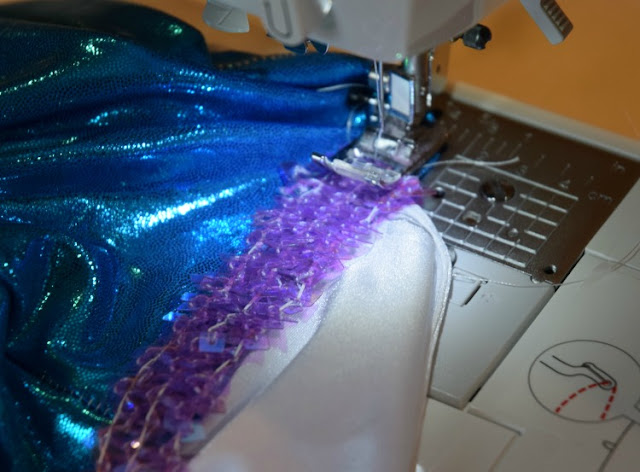
The last part of the waistband is the sequin trim. Place the trim on top of the seam where you added the scales. Sew it in place. Most sewing machines should be able to sew directly through the sequins (they're flimsy). Pull the trim slightly as you sew, so that it will stay nice and stretchy when it's attached. This is the only place that I didn't use a zig-zag stitch, since it left an unsightly seam in the middle of the trim. If I had gone to the trouble of using matching thread, it may have looked okay with a zig-zag stitch instead.
And there you have it! The top of your mermaid tail!
Add a Tail Ruffle and Embelishment
Now for the bottom. Cut a piece of your slinky white fabric about twice as wide as the circumference of the leg opening that your tail has. You'll want it to end up nice and gathered when it's attached. It should be 6-8 inches "tall" with a wavy edge at the bottom and a straight edge at the top.
In order to gather the bottom piece, sew a basting stitch along the top edge. Pull one end of the thread to make it gather until it is the width of the circumference of the bottom opening of the tail.
Sew the ruffle to the bottom of the tail. I didn't bother to pin it but you certainly could.
Turn the tail right side out again. Attach the sequin trim, covering the seam between the tail and the ruffle. Again, stretch the trim slightly as you sew.
Trim all your loose threads, and you're done!
Lena is able to walk fairly well in her mermaid tail. It helps if she pulls it up over her knees! But she is also enjoying playing with it seated like this, or while she pretends to swim in the ocean. Once or twice she's worn it at the dinner table, and it has done wonders for her usual mealtime fidgets (haha)!
Maggie also loves her mermaid tail. So much, in fact, that this is the most she would stand still for a photo shoot for me! She is not nearly so patient as Lena!


