We actually made these magnets over a month ago and gave them as Christmas gifts, but I'm just getting around to sharing them with you. I try to have the girls make gifts that people will can actually use and not just sit around and be pretty. As I brainstormed before Christmas this year, I realized that everyone on our gift list uses LOTS of fridge magnets. Magnets it was! By using some cool textured paper and lightweight foam board, we were able to whip up some super stylish (AND useful) gifts for family members.
Here's how to make your own.
This
post may contain Amazon or other affiliate links. If you use these
links, I may earn a commission at no additional cost to you. Click here for my full privacy and disclosure policies.
Materials For Your Magnets
- Canvas paper
- Paint (We like Crayola and Palmer)
- Brushes, Q-tips, combs, toothpicks, fingers
- Scissors
- Foam board
- Precision craft knife (like an X-Acto)
- Hot glue gun
- Magnets
Paint Your Magnets
Set your children up to paint. When I started this project, I was looking for mini canvas panels, but couldn't find any small enough and inexpensive enough to use. I had never heard of canvas paper, but an employee at our local art store suggested it after I explained my project idea. It ended up being absolutely perfect! Your children get the experience of painting on canvas for a fraction of the cost of real canvas.
This particular pad of canvas paper has sheets that are 6"x6" which makes it really easy to cut into quarters to make 2"x2" magnets (once the edges are folded over). I knew that if I just gave the girls tiny sheets of paper to paint, they'd make little pictures like rainbows or people, or flowers. That would have been pretty, but I thought more abstract work would look better. So I just gave them full sheets of the 6"x6" paper, knowing that I would cut it later.
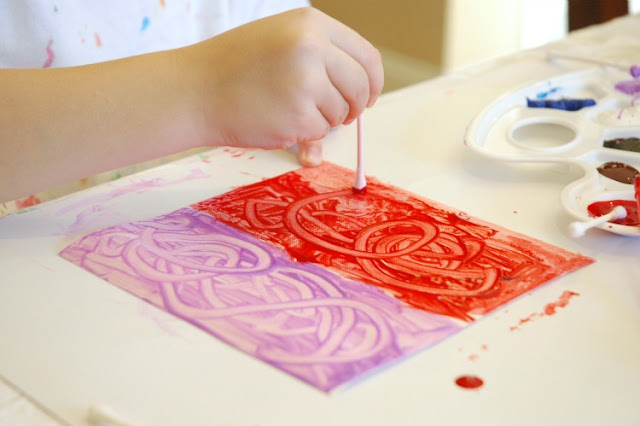
Let your children paint! I suggested that the girls cover each page of paper with color, and then go back and add swirls, spots, or streaks.
They used Q-tips, brushes, combs, and fingers to complete their paintings.
Set the paintings aside to dry.
Turn Your Paintings Into Magnets
Next it's time to cut your foam board! Draw a simple grid of 2"x2" squares on your foam board. Flip the foam board over and draw the same grid on the other side. The squares need to match up! Using your X-acto knife, cut along your lines, on both sides of the foam board. The squares should pop right out.
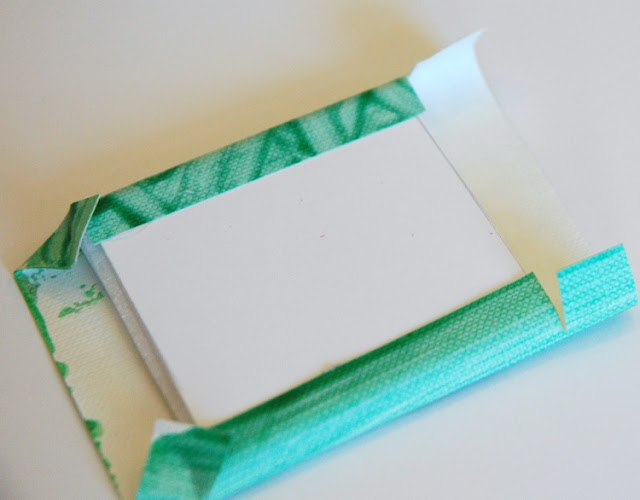
Cut the canvas paper into 3x3 squares. Use your hot glue gun to glue the paintings to the foam board. Flip them over and glue the sides down.
It worked best for me to glue opposite sides down first. Then, snip along the edges as shown above. Fold the little corners down and glue the other two edges down.
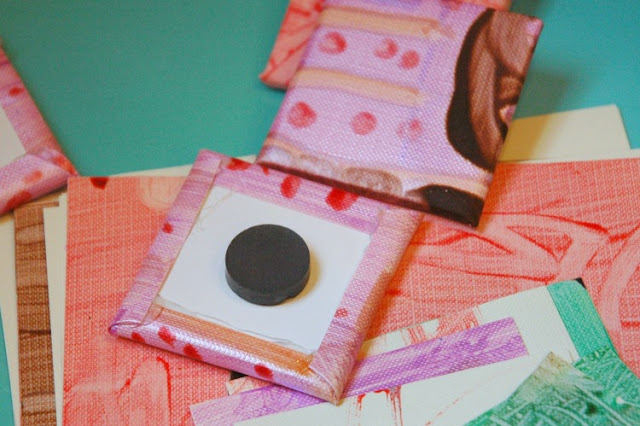
Finally, glue a little magnet in the center. We've used these magnets before, and they're nice and strong. Now put them up on your own fridge, or wrap up a little bundle of 4 or 5 to give as gifts!
You May Also Be Interested In:


