This simple fabric bunting is perfect for decorating a room or sprucing up a party! You can use any cut of fabric you have, but fat quarters are so easy to use, and I've sorted out the folding, measure, and cutting for you. I think you can easily make 10 feet of bunting in about an hour, if you have all your materials handy.
This
post may contain Amazon or other affiliate links. If you use these
links, I may earn a commission at no additional cost to you. Click here for my full privacy and disclosure policies.
All you need is fabric, bias tape, and the usual sewing supplies (thread & scissors). Pinking shears are also a huge plus.
*How much fabric do you need? One fat quarter will make about 3.5-4 feet of bunting.*
Normally you should wash and dry your fabric before sewing. I did that step, but you could easily skip it. Since you probably won't be wearing or washing your bunting, you don't need to worry about the fabric shrinking or pulling.
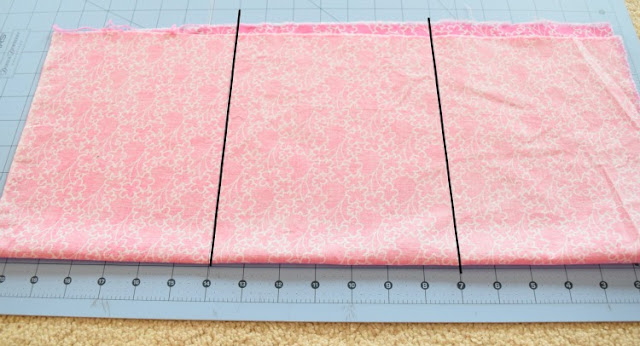
Your fat quarter should be about 22" x 18". Fold it long ways, so that it is 22" x 9".
Cut into thirds, making three pieces that are about 7" x 9". I used my regular scissors for these cuts, so that it would be easy to distinguish the top of my triangles (cut with straight edge scissors) from the sides (cut with pinking shears) while sorting and sewing.
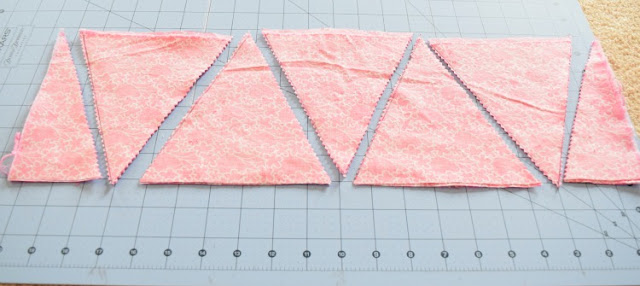
Unfold the pieces, then stack them one on top of another. Draw triangles for your bunting. Your triangles will be 6" wide and 7" long. I made marks at 6" and 12" along one side, and at 3", 9", and 15" along the other side. Then connect those dots, making 5 triangles total (along with 2 1/2 triangles as scraps).
Use your pinking shears to cut the triangles.
Continue with all of your fat quarters until you have a nice stack of triangles.
Next you're going to match up your triangles, placing wrong sides together. Also, go ahead and arrange your fabrics so that you have a nice stack paired triangles in the pattern you'd like them to be in for the finished bunting.
The next step is to sew your matching triangles together, so that the bunting becomes double sided. If you were making your bunting to hang along the front of a table or flat against a wall, you could keep them single sided and skip the next several steps.
Sew along one side, towards the point, and then up along the other side. Don't cut your thread, though!
Just grab your next triangle, leave few stitches after your previous triangle, and keep sewing. This will save you a TON of time. You can make all your triangles quickly, like a little triangle factory! Since the top edge of the triangles will be secure within your bias tape, there's no need to tie off and secure the ends of each seam. And since you went ahead and put your triangles in the correct order for your bunting, it should be quick and easy.
Next it's time to add the bias tape. You can make your own, but it's easier to buy it! I used a skinny little tape (to save on cost for such a big project), but you could also get some that is a bit thicker.
Go back to the beginning of your chain of triangles. Open up your bias tape, and tuck the straight edge (top) of a triangle in. Fold the bias tape over and under the edge of your triangle and sew securely in place.
Follow the chain of pennants all the way to the end!
You May Also Be Interested In:


