We're doing a bit of an author study about Leo Lionni lately. I've found that his books are great for my girls' ages right now. Lena (5.5) is able to really understand and think about the lessons taught in each story. She also notices the little details in the illustrations and is able to talk about the artistic style. Maggie (almost 4) just likes the pretty pictures and cute (sometimes silly) stories.
This
post may contain Amazon or other affiliate links. If you use these
links, I may earn a commission at no additional cost to you. Click here for my full privacy and disclosure policies.
We've especially enjoyed A Color Of His Own. The bright colors are so appealing, and I love the lesson about accepting yourself for who you are.
We've done several eyedropper crafts before, and the girls always enjoy using them as craft tools. This book, especially the artistic style of Leo Lionni, seemed perfectly suited for using eyedroppers. I think you'll agree that the results are oh-so-pretty!
Gather Materials For Watercolor Chameleons
- watercolor paper
- eyedroppers
- liquid watercolors
- cup of water
- paintbrush
- scissors
- pencil
- chameleon template
- black marker
- googly eyes (optional)
- sticks (optional)
Watercolor paper is essential. Regular copy paper or painting paper won't allow the colors to bleed properly.
We love using liquid watercolors. If you don't have any, you can use dried cakes of watercolor and dissolve them in some water. Just pop the little cake out of the package and mix about half of one cake with 1/4 cup of water to give you nice vibrant colors.
Paint Your Watercolor Paper
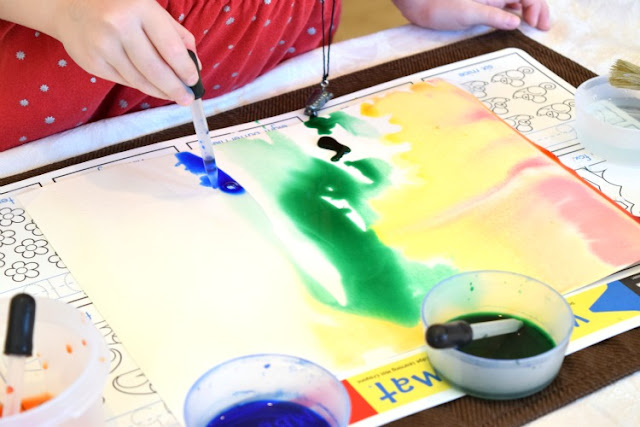
Using a brush and some plain water, brush your paper with a thin layer of water. This will help the colors to bleed nicely instead of beading up. If the paper isn't wet, the colors won't bleed.
It can take a while to get the hang of slurping up some liquid and gently squeezing out one drop at a time!
Try to encourage your children to use one drop at a time. My girls kept wanting to make big puddles (like above), but they eventually got the hang of it!
If you want, you can reference the book and try to copy some of the color patterns.
Set the paper aside to dry.
Trace and Cut Chameleons
Print a chameleon and cut it out. I adjusted the size in my printer settings, and made them big enough to fit 3 chameleons on one sheet of watercolor paper. Trace it on the back of your painted paper and cut it out.
Next, outline the chameleon with a black marker. Add any details (like a mouth) that you want. Glue on a googly eye, or draw one on.
Find a nice straight stick outside and wrap your chameleon's tail and claws around. Our clung pretty easily!
You May Also Be Interested In
Over 25 Complete Preschool Theme Units
The Mixed Up Chameleon Process Art Activity from Preschool Inspirations
Color Changing Chameleon Activity from Artsy Momma
A Color Of His Own Mosaic Craft from No Time For Flashcards
From Other Great Bloggers
Mixed Up Chameleon Painting Activity from Munchkins And MomsThe Mixed Up Chameleon Process Art Activity from Preschool Inspirations
Color Changing Chameleon Activity from Artsy Momma
A Color Of His Own Mosaic Craft from No Time For Flashcards


