This
post may contain Amazon or other affiliate links. If you use these
links, I may earn a commission at no additional cost to you. Click here for my full privacy and disclosure policies.
My 3-year-old daughter, Maggie, is often uninterested in the crafts I set up for the girls to do. I always encourage her to participate, but it's really just not her thing. I recently asked her what kind of crafts she would be like to do, and she told me "mouse crafts" and "pink crafts."
One of Maggie's favorite book series is "Pinkalicious" by Victoria Kann and we've been reading Pinkalicious: Merry Pinkmas over and over this holiday season. In the story, Pinkalicious wants a pink Christmas tree, and is eventually able to convince her parents to buy one. While I wasn't willing to go quite that far, I did think that some sparkly pink Christmas ornaments would be just the thing to bring Maggie up to the craft table.
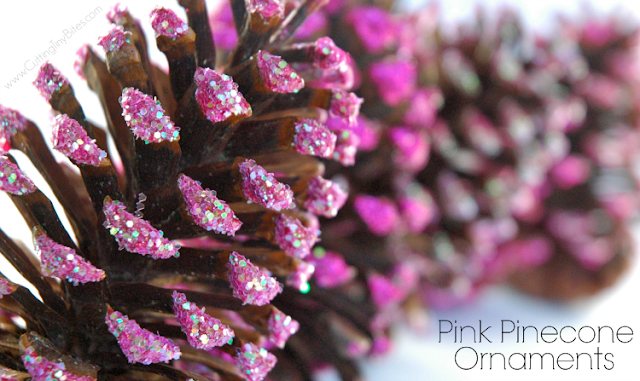
Even though this painted pinecone project was inspired by Pinkalicious, you could certainly make some just because they're beautiful. You could also make these painted pinecones in any color that would match your decor. They're a perfect craft for any age-- can you believe that a 3-year-old made the gorgeous ornaments in these photos?
[Click HERE For More Christmas Crafts And Activities]
Materials You'll Need For Your Pink Pinecone Ornaments
- pinecones (if you don't have access to them, you can purchase them)
- eye bolt screws
- paper plate
- paint (we used inexpensive children's poster paint)
- glitter (pink, silver, or white, fine or coarse-- we used a variety)
- set-up for drying (see below)
Clean & Prepare Your Pinecones
Before you begin your project, you want your pinecones to be nice and open, and free of bugs. You have 2 options that will debug and open them up.
You can bake them in the oven on a foil or parchment lined baking pan, for about about an hour at 250 degrees. Check them frequently to make sure they're okay. You'll roast any little critters, and the heat from the oven will encourage the pinecones to open up.
The other option is to give them a nice soapy water bath, rinse them well, and set them out to dry. It may take several days for them to dry completely, so plan ahead!
If you're planning on using these for ornaments, the next step is to attach an eye bolt. I was able to just screw them in by hand, but you could also use pliars. Find a sturdy area on the underside of your pinecone and give it a go. You may lose a few scales, but should be able to get it in there eventually.
Before you start painting, you'll need to set up an area to hang the pinecones while they dry. I used 2 flour canisters, with a wire cooling rack placed on top. I put a box lid lined with paper underneath to catch any drips.
I also went ahead and made sure to have hooks from which to hang the pinecones after they were painted.
Paint & Glitter Your Pinecone Ornaments
FInally it's time to paint! Make a nice deep puddle of paint. Our paint was fairly thick so it stayed in a pool in the center of the plate.
Keep rolling until you've covered it as much as you'd like, and then slip a hook into the eye bolt and hang them on your rack.
While the paint is still wet, sprinkle the pinecones generously with glitter. For us, it worked best for me to take the pinecone off the rack, hold and turn it while my girls sprinkled them with glitter. Despite my best efforts, I didn't manage to grow a third arm to snap a picture of the glittering process!
We used pink, silver, and white glitter. We also tried fine and coarse. For some we sprinkled one color on from the top and another color on from the bottom, so that the tips had a two-toned effect They are ALL beautiful!
After they've dried, shake off any excess glitter. There will be quite a bit hiding in all those nooks and crannys. Add an ornament hanger, or slip a pretty ribbon through the eye bolt.
While these were made to be ornaments, and are in fact hanging on our Christmas tree right now, they would be gorgeous in a glass container as a table decoration, or you could arrange them into some kind of wreath. They'd also make awesome Christmas gifts for grandparents, friends, neighbors, or teachers!
This post is part of the 10 Days of A Kid Made Christmas series hosted by Mama Miss. You'll find over 80 great Christmas ornaments for kids, all inspired by children's books.
Other bloggers featured today include:
Kitchen Counter Chronicles / A Visit From St. Nicholas And Santa Mouse Too
Flash Bugs Studio / Coco And The Little Black Dress
Creative World of Varya / Christmas In The New House
My Bright Firefly / The Truth About Santa Claus
Messy Little Monster / How To Catch A Star
Living Montessori Now / The Very Hungry Caterpillar's Christmas 123
Little Bins For Little Hands / The Polar Express
Artsy Craftsy Mom / Angels
Planet Smarty Pants / How Snow Maiden Helped Santa Claus


