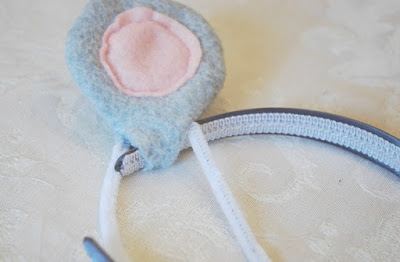
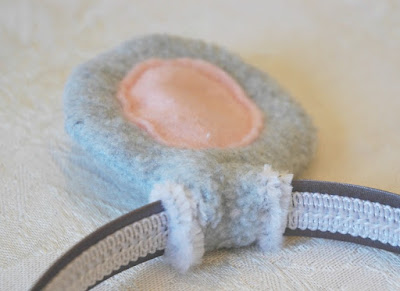
My youngest daughter Maggie LOVES mice. She finds every mouse in every picture book. She asks us to make up songs about mice. She has several mouse toys that she carries around dutifully. She loves to pretend that she's a mouse. So it came as no surprise that she wanted to be a mouse for Halloween this year. And since I am a make-our-own-Halloween-costumes kind of mom, I set about to make her some mouse ears. They're as simple as can be and would be a great addition to any dress-up box or pretend play set-up. You can whip these suckers up in under 15 minutes, grab a gray sweatshirt and pants, and have a last-minute Halloween costume ready to go.
Here's how to make your own.
This
post may contain Amazon or other affiliate links. If you use these
links, I may earn a commission at no additional cost to you. Click here for my full privacy and disclosure policies.
Gather your materials:
- plain headband (ours was gray)
- small bits of gray fleece (or other soft, thick, knit fabric)
- small bits of pink felt (fleece or other knit fabric would also work)
- 2 pipe cleaners (chenille stems)
- regular sewing supplies (sewing machine, thread, scissors)
Cut your fabric. You need 2 barbell shaped pieces of gray and 2 small circles of pink. For each ear, I traced a small bowl twice then connected the 2 circles with a gently curved line. You want the space between the circles to be wide enough to wrap underneath your headband.
Fold the gray ear pieces in half, with the connected bit along one side.
Sew around the ear, leaving about a 1.5" opening above the connected bit. You'll need enough room to turn the ear right side out.
Turn the ear right side out. This is the trickiest part!
Next, top-stitch the pink circles to the ears. You want to leave about .5" between the top-stitching of the pink circle and the outer edge of the ear. You're making a 'channel' for the pipe cleaner to thread through.
Make the 2nd ear.
Take a pipe cleaner and bend a small bit down so that you won't poke through the fabric. Use the folded end as you gently guide the pipe cleaner through the channel that you just made, all the way around around the ear, and out again. The pipe cleaner will help keep the ears from flopping over.
Even up the ends of the pipe cleaner so that you have an equal amount on each side.
Slide the ears onto the headband.
Wrap the excess pipe cleaner around the headband to keep the ear in place. You can also use the pipe cleaner to scrunch the ear up to give it a more folded look. Be sure not to leave the pokey end of the pipe cleaner down where your child's head will be.
Position both ears in place and trim any excess thread!
Squeak, squeak! Ready to go!
You May Also Be Interested In:


