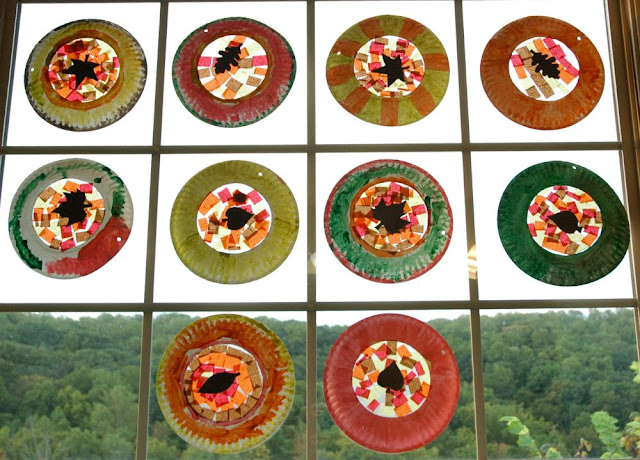
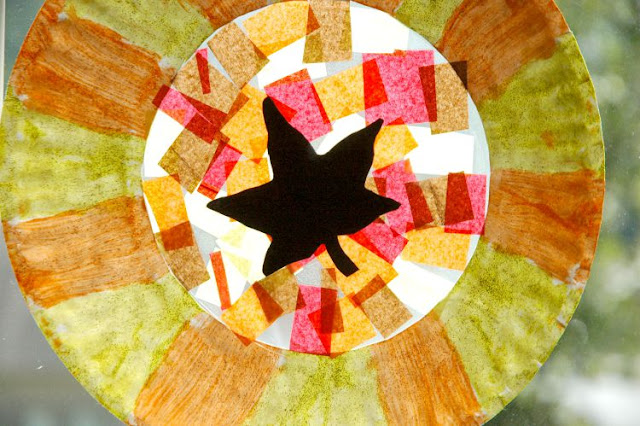
Even though the leaves are just barely starting to change colors here, we've got fall on the brain! The air is a bit crisp in the mornings, and the afternoon humidity is becoming less oppressive. These beautiful Fall Suncatchers decorating our windows have really helped get us in the mood for fall. I can't wait to see them in the sunshine with a ridge full of beautiful autumn colors behind them!
[Click HERE For More Fall Crafts And Activities]
This
post may contain Amazon or other affiliate links. If you use these
links, I may earn a commission at no additional cost to you. Click here for my full privacy and disclosure policies.
Here's how to make your own.
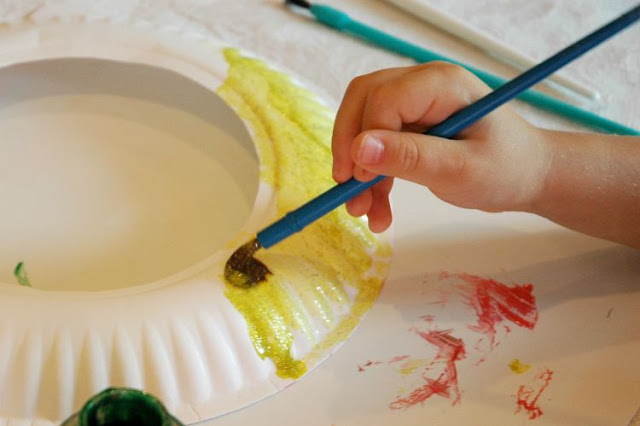
Start with plain white paper plates. Cut a hole in the center, just a bit smaller than the flat area. I found a bowl the right size and traced it.
Start with plain white paper plates. Cut a hole in the center, just a bit smaller than the flat area. I found a bowl the right size and traced it.
Next, paint the outside edge. We chose to use one of our favorite paints, Crayola Glitter Paint. We painted the convex side (the outer edge of the bowl). I had imagined them painted with solid fall colors, but Lena went crazy and made beautiful designs instead. Maggie stuck with solid colors. Set them aside to dry.
Cut circles of clear self-adhesive film (Con-Tact Paper), larger than the hole you cut in the center. Again, I found it easiest to find a bowl the right size and trace it. Place your self-adhesive film inside the paper plate, so that the sticky side will be on the same side as the paint. Your contact paper probably won't stick to the painted side, so that is why it needs to go on the plain white side (the inside of the bowl).
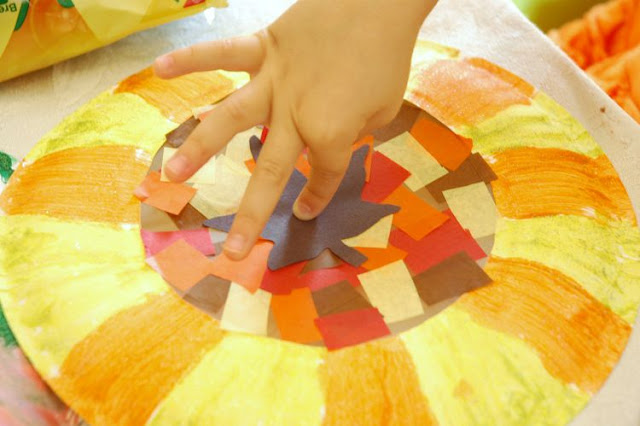
Using small squares of fall colored tissue paper, fill in the center of the plate. You can cover it fully or leave some open space. Lena even made some stripes.
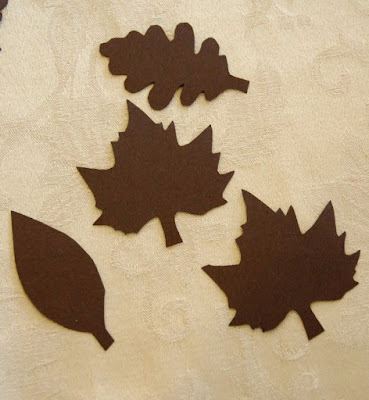
Next, cut out some small leaf shapes from black construction paper. I printed the small leaf outlines from First Palette, cut them out, and traced them on black construction paper. If you were super adventurous you could try to free-hand them, or even use other fall shapes like acorns or pumpkins.
Place a leaf in the center of each suncatcher.
Finally, cut another circle of clear self-adhesive film. Since it doesn't stick well to a painted surface, I cut them the same size as the original hole in the center of the paper plate. Gently place it on top of the tissue paper and leaf shape, then press it into place.
Finally it's time to hang them in the window! You can punch a hole in them and hang them with ribbon, or put a small piece of tape on the back side.
Fill your windows and you'll be ready for fall!
For lots more ideas for fall crafts and preschool ideas, visit the What Can We Do With Paper And Glue Pinterest board below.
You May Also Be Interested In
Fall Theme- Weekly Home PreschoolMarble Painted Apples
20 Healthy Fall Snacks
Eye Dropper Fall Tree Craft
From Other Great Bloggers
Falling Leaves Suncatcher from Stay At Home EducatorMelted Crayon Fall Window Suncatchers from Powerful Mothering
Fall Color Stained Glass Suncatcher from Sunshine Whispers
Fall Tree With Suncatcher Leaves from Mess For Less


